SSL Certificates with SAN Attributes

Table of Contents
This document will guide you through creating a Certificate Signing Request (CSR) with Subject Alternative Names (SAN).
Getting Started #
These instructions have been run on a RHEL Linux system.
SAN stands for “Subject Alternative Names” and this helps you to have a single certificate for multiple CN (Common Name). In SAN certificate, you can have multiple complete CN.
For example:
- example.com
- exmaple.net
- example.org
You can have the above domains and more in a single certificate. One use case for this is loadbalancing, the Virtual IP could be the CN and then the hosts behind the LB would be the SAN entries.
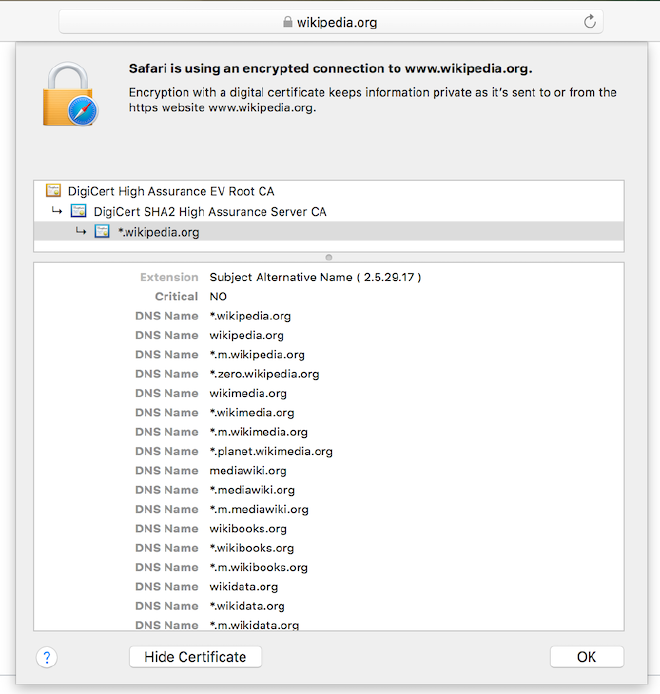
Next we look at a real life example of wikipedia.org, which has many SAN entries in a single certificate.

As you can see in the screenshot there are multiple SAN entries for the wikipedia.org URL.
Prerequisites #
A working installation of OpenSSL
[root@server ~]# yum install opensslCreate CSR Config #
Create a directory to hold the CSR, Key and eventually the Certificate
[user@server ~]$ cd /tmp
[user@server ~]$ mkdir /tmp/san_cert
[user@server ~]$ cd /tmp/san_cert
Create a file called san.cnf
[user@server ~]$ touch /tmp/san_cert/san_cert.cnf
[user@server ~]$ vi /tmp/san_cert/san_cert.cnf
Add the following content to the /tmp/san_cert/san_cert.cnf file
[ req ]
default_bits             = 2048
distinguished_name       = req_distinguished_name
req_extensions           = v3_req
prompt                   = no

[ req_distinguished_name ]
countryName              = DE
stateOrProvinceName      = BY
localityName             = Munich
organizationName         = SomeCompany
organizationalUnitName   = SomeUnit
commonName               = vip.example.com
emailAddress             = user@example.com

[ v3_req ]
subjectAltName    = @alt_names

[alt_names]
DNS.1             = vip.example.com
IP.1             = 192.0.2.10
DNS.2             = host01.example.com
IP.2             = 192.0.2.20
DNS.3             = host02.example.com
IP.3             = 192.0.2.30
To add additional SAN records, add to the alt_names section and save the file
Create the CSR #
Execute the following OpenSSL command, which will generate CSR and KEY file
[user@server ~]$ openssl req -out /tmp/san_cert/san_cert.csr -newkey rsa:2048 -nodes -keyout /tmp/san_cert/san_cert_private.key -config /tmp/san_cert/san_cert.cnfThis will create san_cert.csr and san_cert_private.key in the /tmp/san_cert/ directory. You have to send san_cert.csr to certificate signing authority so they can generate and provide you the certificate with SAN attributes.
Testing #
Verify the CSR #
You can verify the CSR has been created with the SAN attributes by running the following command, the output should list DNS and IP entries, if nothing is returned there is a problem with the cnf file.
[user@server ~]$ openssl req -noout -text -in /tmp/san_cert/san_cert.csr | grep DNS
                DNS:vip.example.com, IP Address:192.0.2.10, DNS:host01.example.com, IP Address:192.0.2.20, DNS:host02.example.com, IP Address:192.0.2.30